3 June, 2025
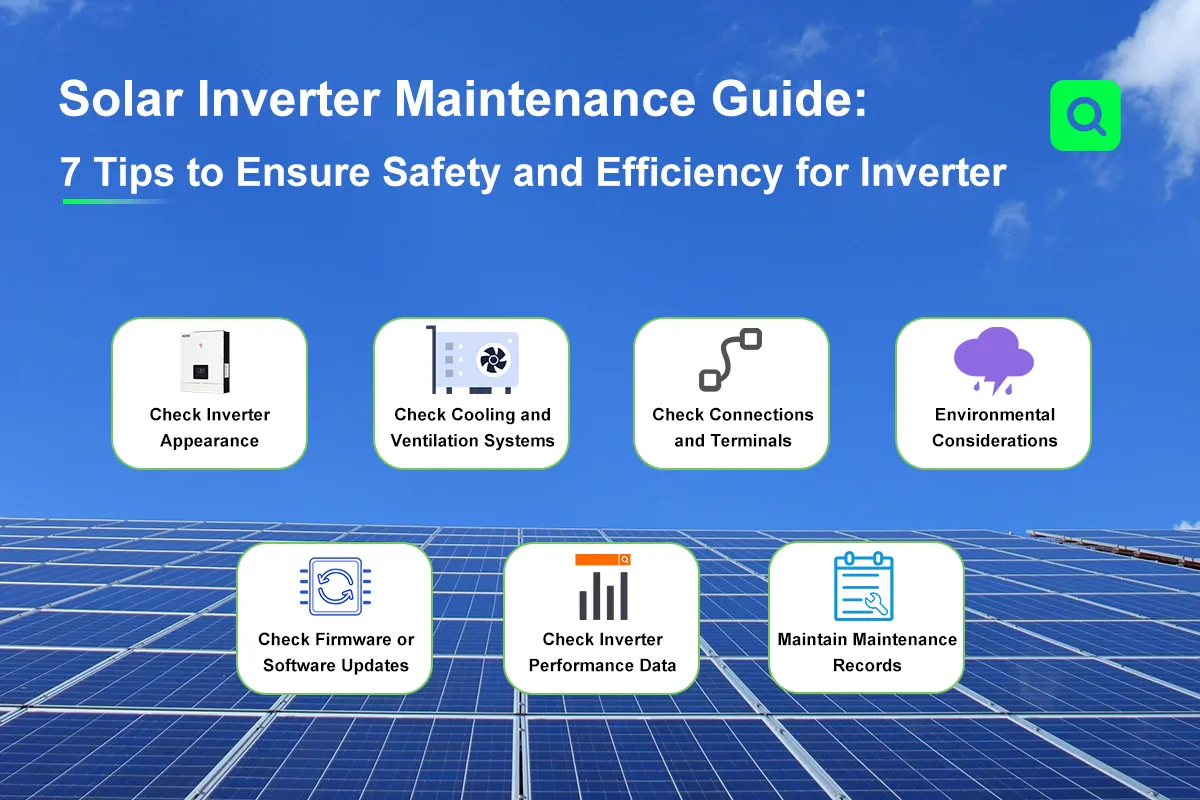
Solar Inverter Maintenance Guide: 7 Tips to Ensure Safety and Efficiency for Inverter
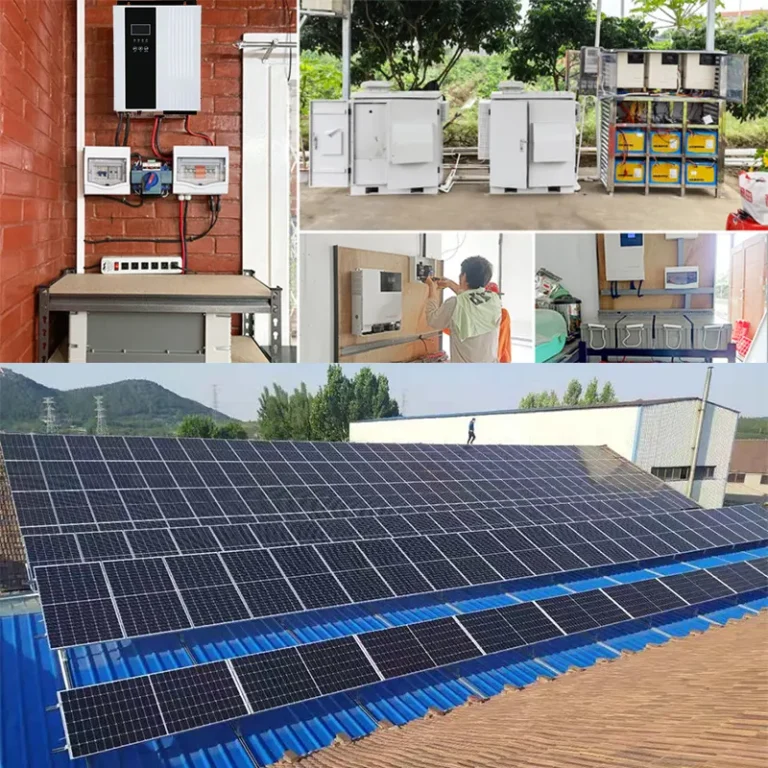
The inverter is a critical component in solar power systems, responsible for converting the DC electricity generated by solar panels into AC power for grid connection or household use. Regular maintenance and timely troubleshooting are essential to ensure the inverter operates efficiently and safely.
This blog provides a comprehensive and systematic solar inverter maintenance guide, covering seven essential tips to help users implement optimal inspection and maintenance practices. The article primarily addresses areas such as inverter appearance checks, ventilation and cooling system inspections, connection terminals, environmental considerations, and firmware updates. By regularly performing preventive maintenance and taking the necessary actions, users can maximize the performance and lifespan of their solar inverters, minimize power generation losses due to faults or repairs, and improve the profitability of their solar investments. Let’s dive into these inverter maintenance methods.
1. Check Inverter Appearance
Inspection
- Look for dents or cracks on the casing. Damage can reduce the protection level below IP65, allowing water ingress that can short-circuit the PCB and cause deformation of internal components.
- Check if the surface coating is peeling or rusted. Moisture accelerates electrochemical corrosion of metal parts, and rust can spread to grounding terminals, compromising grounding effectiveness.
Corrective Actions
- Power off the system and confirm no residual voltage.
- If the casing is deformed by more than 5mm, contact the manufacturer to replace the enclosure and provide the equipment serial number.
- Install the inverter in a temperature-controlled, dry environment, avoiding direct exposure to water or sunlight to reduce the impact of harsh weather.
2. Check Cooling and Ventilation Systems
Inspection
Inspect whether the inverter cooling system is functioning properly. Over time, dust, debris, and insects can accumulate in the inverter vents, reducing cooling efficiency and causing overheating issues.
Corrective Actions
- If the cooling system malfunctions, contact the installer to replace the faulty cooling system.
- If vents are blocked, first disconnect all power switches related to the inverter, then use a brush head to vacuum in the direction of the heat sink fins. Internally, carefully clean the fan bearings with a dry cotton swab.
- If heat sinks are dusty, power off and ensure no voltage before using compressed air to blow off dust or anhydrous alcohol wipes to clean stubborn dirt. Consider installing a stainless-steel dust filter at the vents.
3. Check Connections and Terminals
Ensure all connection wires are secure, free from damage, and properly fastened.
Inspection
Check the status of DC and AC terminals on the inverter. Loose terminals can increase contact resistance, causing overheating or electrical sparks. Corroded or worn cables may lead to short circuits, damaging the equipment and creating fire hazards.
Corrective Actions
- For loose terminals—shut off the DC switch and tighten terminals with a screwdriver until there is no wobble.
- For worn cables—power off and confirm no voltage, then use PV-specific crimping tools to re-terminate the cable.
- For failed sealing—if water or dust accumulates inside the terminal slot and the waterproof grommet is aging or cracked, clean with a cotton swab and anhydrous alcohol, and replace with an IP68-grade seal ring.
If unsure how to proceed, contact a professional installer for assistance.
4. Environmental Considerations
The inverter’s performance is strongly influenced by environmental and installation conditions such as obstructions, temperature, humidity, and physical risks. Ensure that the equipment operates in safe and suitable conditions.
(1) Obstructions
Inspection
Check if there are weeds, debris, or equipment obstructing the inverter and its ventilation ports.
Corrective Actions
Remove weeds and objects within 1 meter of the inverter, and ensure at least 50 cm of clear space around ventilation openings to prevent performance issues and maintain proper cooling.
(2) Direct Sunlight / Rain Exposure
Inspection
Check if the inverter casing temperature exceeds 60℃, or if water accumulates on the inverter’s top.
Corrective Actions
Most inverters are rated up to 60℃. Ensure operating temperatures stay below this limit to avoid overheating.
Based on IP protection level, the installation site should provide good shade and prevent direct water exposure; consider adding a canopy or waterproof cover for extra protection.
(3) Humidity
Inspection
Check if condensation is present on terminal surfaces or water droplets inside the enclosure.
Corrective Actions
Use a dehumidifier to remove excess moisture, and place moisture-absorbing boxes (like silica gel desiccants). If possible, relocate the inverter to a drier and well-ventilated location.
5. Check Firmware or Software Updates
Inspection
Check whether the inverter’s firmware or monitoring software is updated to the latest version. Outdated software may result in abnormal functionality, reduced efficiency, or security vulnerabilities.
Corrective Actions
For outdated firmware—the monitoring app will prompt for updates; follow the instructions to upgrade.
If the update fails—issues like a red indicator light or screen freeze may occur. Refer to the manual to reset, or send error screenshots and the serial number to the manufacturer for remote support.
6. Check Inverter Performance Data
Inspection
Check the inverter display or monitoring platform for operational data. Sudden drops in power generation or abnormal efficiency may indicate component issues or equipment faults, requiring prompt intervention to avoid revenue loss.
Corrective Actions
- Use the manufacturer’s monitoring application to review inverter performance.
- If you notice sudden power generation drops, low efficiency, abnormal voltages, or communication interruptions, investigate immediately, record the issue, and contact the installer to resolve and document the corrective measures.
7. Maintain Maintenance Records
Inspection
After each maintenance session, verify that critical data is fully documented to ensure traceability and accountability. Records should include inspections, cleaning, replacements, and repairs, and be used to determine the ideal maintenance frequency to reduce fault rates and extend inverter lifespan.
Corrective Actions
Use electronic records when possible and log maintenance activities in the appropriate system. Check off tasks such as ventilation cleaning, terminal tightening, and software updates, while synchronizing photos and data if possible.
For faults, categorize them by severity and define response times and requirements to minimize potential losses.
Final Summary
Maintaining your solar inverter is not just about keeping it running—it’s essential for ensuring the safe, efficient, and long-term operation of your entire PV system. By following these detailed maintenance guidelines, you can proactively prevent common inverter faults, maximize energy production, and extend the lifespan of your investment.
share